Todd McCormick's Cultivation Tips:
I receive a lot of email from new growers who are asking me really fundamental questions about how to handle their seeds and how to set up their grow so I figured I would take a few minutes and share with you the steps that I take when I sort through a pack of seeds.
When you receive your seeds store them in the packages that you received them in, inside of a humidity resistant container such as a mason jar and use desiccants to absorb any moisture that may be present. I prefer to use pink and blue color changing desiccants, which are available on Amazon and reusable. They start off blue when they are dry and they turn pink when they pick up moisture indicating that you need to switch them out. You can then reuse them by placing them on tinfoil and heating them up in a small oven at 230°F for one hour and they will again turn blue.
I do not recommend using rice as a desiccant because it can get moldy and mold can and will destroy seeds.
Store the humidity resistant container inside of your refrigerator between 36°F and 39°F and they can last decades.
I do not recommend putting the seeds in a freezer because any moisture within the hull can expand up to 10% and cause the hull to crack and kill the seed. Unless you are properly drying the seeds and storing them for a very long period of time, I recommend against freezing.
When You Are Ready To Grow
I recommend germinating your seeds and starting them off under 18 hours of light and numbering them one through however many you have.
Please read our Germination tips article:
https://agseedco.com/blogs/news/germination-tips
Selecting Through a Pack of Seeds
For the sake of this explanation, let's say that you are growing 10 seeds.
Once the seedlings have establish themselves, number the plants 1 through 10 and replant them into a pot of soil using Roots Organic LUSH or the equivalent, which is a complete all-mix medium that does not require additional nutrients for the first couple months.
We recommend Roots Organic LUSH because of the high quality ingredients. You can use anything that works for you, but we have used this soil for years and it never disappoints.
Regardless of the soil you use, you need to spend time learning about the nutritional requirements of plants and make sure that you do not over-fertilize or under-fertilize, or bring your root zone out of the pH zone that it can uptake nutrients.
We pH our water at 6.3 to 6.4 and depending on the quality of your water, you may or may not have to filter it. I usually recommend against filtering water because it is often unnecessary because your plants use a lot of the trace minerals found in tap water.
Do not over water, one of the most common mistakes is to give too much water to your plant. I recommend if you are hand watering to only water one side of the pot each time that you water and allow the water to wick over to the other side of the pot, so that there is always enough oxygen in the root zone for the plant to grow correctly.
Let Your Mothers Grow
Let your seedlings become mother plants, even though they are an unknown sex, treat them all the same way and let them grow under 18 hours of light until they are about 18 inches tall with multiple nodes.
Take a 4 inch cutting from the main stem. I recommend using Hormex #8 rooting powder, the stuff has been around forever and it works great. My grandmother first showed it to me in 1984 when she taught me how to make cuttings, as she was doing it in her garden for years.
Number the cuttings with the same name and numbers as the mother plants and give them between 14 days and 21 days to fully root and harden, by harden I mean that the cutting moves from a fragile stage of just getting roots to an established stage of making a lot of roots and being ready to replant into a pot of soil.
I recommend Oasis Rooting cubes or Grodan cubes as both work great. I prefer Oasis when I am using soil because they biodegrade. When I take cuttings, I make a mild nutrient solution of around 300 to 350 ppm at 5.8 pH and soak the rooting cubes in the solution before using.
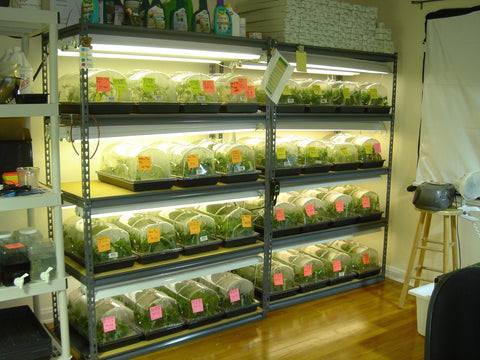
During the 14 to 21 days of rooting, the cuttings stay under a humidity dome on a 10 x 20 tray under a clone specific LED light 24 hours a day. I use the same water described above that I soaked the cubes in initially to water the cuttings when they need it.
- Keep the rooting cubes moist, but not wet.
- Do not allow them to sit in water, but make sure they are always moist.
- Overwatering can cause a dampening-off effect and kill your cuttings.
- Under-watering will dry the cuttings and kill your cuttings.
Four Rooms or Zones
I have to go back to the general concept of building your cultivation space.
To put it simply, you need four zones.
A Mother Zone: which will have 18 hours of light and the plants will be able to get up to 2 to 3 feet high. Using an LED light 48 inches above the growing surface will be all the height you need for successful mother plants. Your temperature goal should be about 75°F at about 70% humidity for proper transpiration.
A Cloning Zone: which will have 24 hours of low wattage light. This can be simply a shelf with a single LED strip that has about 12 to 14 inches of height, and at least 2 feet of width and a foot of depth. You can get by using a single shelf and a single light to make a lot of cuttings. Your temperature goal should be about 75° to 80°F with an ambient humidity of about 70% and a higher humidity within the humid dome.
A Flowering Zone: which will have 12 hours of light and the brightest grow lights that you can afford. You will also need fans and the ability to control your environment, meaning you want to keep your flowering temperature at around 72°F with a humidity that fluctuates between 50% to 75% humidity depending on the stage of growth.
A Drying/Curing Zone: which will have complete darkness except when you're working in the room. Many beginner growers do not think that having a dedicated drying/storage/curing room is important until they over-dry and ruin their crops, but most cannabis that is grown wonderfully and lovingly can easily be ruined within the first 10 days of being harvested due to improper handling and storage. Your temperature goal for this room is between 60°F and 70°F, but getting up into the low 70’s does not hurt the crop as long as you maintain a 60% humidity level at all times. Building yourself a walk in humidor may sound excessive, but I would even go further and tell you that understanding the relative humidity in the room is important to maintaining the quality of cut flowers all the way through until you smoke it.
I recommend having a dedicated room to both drying and curing cannabis that is humidity and temperature controlled with a work bench where you can trim flowers in the humidity controlled room, so that the flowers do not over-dry while trimming them. As I write this article, the temperature in my office is 79°F at 44% humidity which feels great, but would ruin good cannabis after just a few hours after being exposed to it.
There is a company out of Vermont called Cannatrol which is applying the same technology that is used for curing meat and cheese to cannabis harvesting. They created a small “Cool-Cure” mini refrigerator that does all of the work of drying and curing your flowers for you. It is worth checking out their website to better understand why it is important to correctly handle your crop post harvest.
Keep in mind that once the terpenes evaporate off of the flower, they don't come back.
Light Recommendation
There are a lot of really good LED lights on the market these days, and I have hardly used all of them so I am not an expert on everything that is available, that said, I would highly recommend lights from either SpecGrade LED or FōHSE. I use lights from both manufacturers and I am really happy with everything that I've used from them.
WTF IS VPD
Speaking of humidity, there's a lot of conversation around VPD, which stands for vapor, pressure and deficit, and that basically means that your room is too dry.
Photosynthesis happens by a plant using a combination of nutrients, minerals, light and through transpiration, the plants breathe in CO2 and release O2, but they can only do that when the temperature and humidity are in the proper zone.
When your grow room is too damp or too dry, plants cannot breathe or transpire, so what you want to do is get a humidifier if you live in a dry environment or a dehumidifier if you live in a moist environment or both if you have extreme winter and summer seasons.
Your goal is to maintain your growing area with a temperature of between 65°F and 75°F during the day and night with a relative humidity of around 65 to 70%.
I've been using this chart to stay in the green zone for years and cannabis responds well to it:

Sometimes it is necessary to have both a humidifier and a dehumidifier in order to keep the room in the proper humidity zone. Your goal is to coexist with the environment you are living in, compensate for dryness in the winter and compensate for humidity in the summer.
In the vegetative stage, it is good to have higher humidity, but in the last three or four weeks of the flowering stage, it is better to bring the humidity down if you are growing Northern varieties.
Comparatively, tropical/equatorial varieties love the humidity and is why they have loose spindly flowers that can dissipate the humidity in a tropical region easily without having mold issues.
Back To Your Cuttings
Now that you understand the zones in which you need for growing cannabis, you will be moving your cuttings from the cloning zone into the flowering zone and there is a new term that you need to become acquainted with and that is “Pre-Grow” or “Veg-time”, which basically is shorthand for vegetative growth.
Vegetative growth or pre-flower growth, happens naturally between May 15 and the summer solstice, as cannabis is an annual plant that grows in spring and flowers in the summer, the same thing is happening in your indoor cultivation space: your mother zone is spring and your flowering zone is summer.
In my over 35 years of teaching others how to grow cannabis, the one subject that seems to have the most confusion to growers is veg time or pre-grow. Which is simply the time between when a cutting grows roots and when it is moved into flowering.
Most indoor cannabis growers give their plants too much pre-grow and grow them too big for the space that they're using.
I had been growing for 10 years before I made it to the Netherlands in November 1994, and the first time that I saw a perfect square meter of cannabis, growing in a sea of green of plants, all the exact same height and of the exact same variety, next to each other like popsicle sticks with leaves reaching for the light. I had the realization at that moment that I had been doing it wrong all along, and that was clearly how it was supposed to be done.
In short, imagine having a 4' x 4' area with 50 little flowering pots, instead of allowing your plants to get big, you move them from cloning into flowering with little to no pre-grow.
Depending on the variety, between when the cutting shows roots and anywhere between 1 to 7 days of vegetative growth, you replant the cuttings into the 50, 1 gallon flowering pots and allow them to start flowering under 12 hours of light.
From that point on, you are counting down the days to your harvest, as most cannabis will finish flowering in anywhere between 56 and 70 days depending on the variety.
A short representation of your first grow schedule can look like this:
Week 1:
Germination and growth in Jiffy pots.
Week 2:
Replanting into a 1 gallon pot with fresh soil.
Weeks 2 through 5:
Growing your seedlings into mother plants.
Week 5:
Take first cutting:
Weeks 5 through 8:
Rooting happens in about 14 to 21 days
Integrated Pest Management/IPM
I would recommend that you start understanding insect pest management, or IPM as we call it. We spray 2 ounces per gallon every three to five days of Trifecta, which is an essential oil based anti-fungicide and anti-bug solution that works wonderfully. It is organic and very pleasant to work around. I have been using it for over two years and I highly recommend it to everybody.
Integrating IPM into your garden will help keep it clean and help keep the labor down and can save good plants from bad bugs and powdery mildew. I recommend spraying at all stages of growth and cutting off in the final few weeks of flowering. If you have been taking care of your plants, they should be clean and not need any help in the final stages of development.
Week 8 of growing and starting week 1 in flowering:
Replant your rooted cuttings into 1gal flower pots and place them into your flowering room.
Weeks 9 through 11 of growing and weeks 1 through 3 of flowering:
Your plants in flower will show sex in the first 14 to 21 days of flowering and my suggestion is to kill the males.
You should have written names and numbers on tags with all of your cuttings, so that you know specifically which cuttings are from which mother plants. My suggestion after discovering the sex of your plants is to go and eliminate all of the males that you have been keeping as mother plants under 18 hours of light in your mother zone. This will free up space and allow your mothers to have more room to grow.
The main goal is to eliminate all of the inferior plants until you have discovered the best example of any given variety from any given pack of seeds.
Weeks 12 through 18 of growing and weeks 4 through 10 of flowering:
Watching your flowers grow and develop while taking notes and photos through the whole process.
Mother Zone: During the same time, your mother plants will be turning into small bushes and you can start taking cuttings from them and stacking them up, getting ready to replant them into your flower zone as soon as you harvest.
Selection Process
Something I've always reinforced in every lesson that I have taught about cultivating cannabis is that you should not be quick to judge a book by its cover, or more specifically, not to judge a plant by how it grows.
Do not let the growing characteristics, meaning; the yield, speed of flowering, or vigor, be the deciding factor on if that is the best example of any given variety. Allow the flowers to fully finish, harvested and properly dried, before you make decisions on which one you like best.
I have had many instances of the best growing sister in a pack of seeds, not being the best smoking flower. Even though one of the sisters yielded a bigger flower or finished a little faster, she wasn't the one that I wanted to smoke or hold onto because the flowers were not as high of a quality as one of the other plants which did not grow as well.
My method of selection is to allow the entire process to take it's course and to smoke the dried and cured buds and decide which flower I that like best. Olfactory testing is the real test and the only test that matters in my humble opinion. You need to like how it smells and like how it tastes if you're going to be coming back to it time and time again.
The final cannabinoid, terpene and thiol combinations are far more important than the growth characteristics when it comes to what you will consider to be the best example or the best smoke.
Selection based on aroma, taste and effect should be your main goals
My comparison would be to having a high nutritional food which does not taste or smell too good, and even though it tests high in nutritional content, you don't feel like eating it because it does not appeal to the senses.
A lot of the cannabis on the market today has a high THC test, but doesn't smell or taste that good and to me that loses the entire point of the experience. How many of us have been disappointed in store-bought cannabis that has a high THC test number on the label, but doesn't seem to get you that high or feel that satisfying.
OG Kush is a great example of a plant that does not grow that great, doesn't yield that well and takes almost 10 weeks to finish flowering. But all that said, it is world famous and beloved by many who have smoked it. I have had it in my living library collection since November 2004, as it has been and will be one of my favorites forever.
Which brings me to the point of why I am recommending that you start all of your seeds and treat them like mother plants without exposing them to 12 hours of light for sexing, because some of the more northern varieties do not like to be reversed from a flowering environment and they will forever be stunted in growth.
The solution is to keep the seedlings/mother plant under 18 hours of light perpetually, take cuttings, and use the cuttings to both sex and select the best examples from any given pack of seeds. Replenish your mother plants with fresh cuttings and you can keep the plant that you love forever.
Doing it this way, every single pack of seeds that you purchase turns into an investment. After you go through sex and selection and eliminate all of the plants except for your favorite, you can keep that example as a mother plant perpetually for decades.
Weeks 18 - 20 of growing and weeks 1 through 3 of Drying & Curing Flowers:
I recommend having a drying and curing zone already set up so that you can move your harvested plants from the flowering room into your drying room without any issues. (I also recommend keeping a schedule and having your cuttings ready to replant into your harvested flower zone, so that you do not lose even a single day of productivity in your garden.)
I use metal hangers and hang the plant upside down by one of the branches and I allow it to dry in a humidity controlled room at about 60°F to 70°F at a 60% relative humidity.
I do not cut off any of the leaves in this stage because they work as wicks to pull the moisture from the stems and evaporate away through the leaves instead of through the flowers. The result is that the moisture will escape the plant through the leaves instead of through the buds, causing the buds to retain the rich terpenes that are highly volatile and easily evaporated.
The concept is to allow the moisture to evaporate away from the plant slowly without taking with it the volatile terpenes that make up the scent and flavor of the final product.
The initial drying stage takes 7 to 10 days depending on the environment and your ability to control it. The cooler the room is and the better than humidity is controlled, the longer it will take for the moisture to evaporate, but the the buds can be absolutely perfect if you practice patience.
The second stage of drying is to cut the plants into 10 inch to 12 inch pieces and put those pieces into a paper grocery bag or cardboard box and close the box, or if you're using a grocery bag, simply slide another grocery bag over the top so that you have a rectangle box that will breath and allow your flowers to cure. When putting the cut stems into the paper bag, I cut away any of the larger dried leaves and discard them.
Do not to put your flowers into the cardboard box or paper bag too soon because if they are too moist, you can cause mold.
Curing the Oils on Cannabis Flowers
There is a thin layer of oil coating on the plant which you have felt when you touched it and it got all over your hands and arms. Your goal is to allow this oil to harden and cure slowly, so that 90% of the moisture within the flower escapes and leaves about 10%, the oils will harden as this happens and trap the other 10% moisture in the flower.
This is the stage we refer to as curing. Just like paint on wood, the paint has to dry, cure and harden, which can only be done in a cool, dry place. Cannabis flowers are very similar on a microscopic level and the oils on the plant need to dry and cure in a cool, humidity controlled environment. The flowers will be in this second stage of curing inside of the bags for another couple weeks before you're comfortable with putting it in a mason jar for long-term storage.
At this point you should know which of the 10 seeds/plants is your favorite female and you should have eliminated the other 9 plants that were not as good as your favorite.
Storing Cannabis Flowers
My suggestion for storing cannabis is to keep it in humidity resistant containers, such as a mason jar, and store it in a dark in a cool place, and occasionally open up the jars to release any built up gases.
A Tip: Take fresh leaves from your garden and place one or two cannabis leaves into your bag of dried buds, as they will transfer a proper humidity level to the dried flowers and the scent, taste, and smoke of the flowers will be richer and more enjoyable.
Scheduling Success on the 1st & 7th of Every Month
At this point forward, I would recommend this simple schedule to grow your own cannabis perpetually:
Maintaining your mother plants and cuttings in separate zones, divide your flowering area into two. If you can fit 50 little plants, put 25 in the first day of the month and wait another 30 days and then put the other 25 little plants into the second half of your flower room.
Take cuttings on the 7th of the month and allow them to have 21 days to root and harden before they are transplanted into the flower room on the 1st.
You will now be harvesting half of your flowering zone on the 1st of every month. You will also be replanting the cuttings that you took on the 7th into the flowering room immediately after you harvest and clean the flower zone.
Using this easy schedule, you will be able to harvest most cannabis plants in roughly 60 days of flowering and you can make a lot of cannabis in a little bit of space with a little bit of effort, if you are organized and understand the process.
A Tip: A grower can dial the higher of any variety by simply harvesting at a different time. In my experience of experimenting, I have found that flowers that are harvested early have a lighter and more psychedelic effect, compared to the same flowers harvested later in maturity, which have a more sedative effect.
Cultivating Outdoors
May 15th is the day that you should move your plants outside in the northern hemisphere.
I get a lot of questions from people asking me when they should put plants outside for their summer season. Unfortunately, putting plants outdoors too early causes them to go into flowering and then get confused and lose their vigor. Waiting to put your plants outdoors on or after May 15th will allow the plants to grow to their full potential.
If you are an outdoor grower, I still recommend keeping your mother plants and cuttings inside, so that you can sex and select them before you are putting your plants outdoors.
The easiest way to grow outdoors is to take selected cuttings that already have some pre-grow and have establish themselves into small plants and repotting them outdoors directly into fresh soil.
Auto-Flower Genetics
The reason that Authentic Genetics does not carry “autoflowering” genetics is because I like to smoke all of the cannabis I grow, and while there are some exceptions and some quality varieties now being represented in the autoflowering category, they have been few and far between. The autoflowering is achieved by breeding together a really high cannabinoid plant and a low cannabinoid hemp plant. Their prodigy will be half really good plant and half really low-cannabinoid industrial hemp plant, but it will automatically go into flower after weeks of growing regardless of the light cycle.
While there are some upsides to this, there are more downsides, such as the fact that you cannot keep an auto flowering genetic as a mother plant because it goes into flowering even if it's a clone, it doesn't matter, it's all based around the age of the plant.
Which is why I prefer to work with regular genetics, which I can keep as mother plants for decades.
All cannabis will automatically flower between June and April
All cannabis will automatically start to flower after the summer solstice, so if you are growing mother plants and making cuttings, you can continually put cannabis plants outdoors pretty late into July or August depending on the length of your growing season. This will cause the plant to go directly into flowering and depending on the genetics how much they grow during flowering, you will wind up with smaller plants, but you will still get some nice flowers.
Places in the south west such as Southern California, can put cannabis plants outdoors between June and March and a majority of modern cannabis genetics will finish flowering in 8 to 9 weeks.
Grow Huge Plants
Here in California, one of the methods of growing really large plants is to start a cutting in January under lights and allow it to grow under 18 hours of light indoors from January to May into a 6 or 8 foot very established plant before bringing it outside around May 15th and repotting it into a 200 or 300 gallon smart pot. Then building trellis around this plant that will grow to 2 to 3 times its size between May 15 and June, and then produce an enormous amount of flowers, sometimes between five and 10 pounds of good buds. At this point these plants look more like trees then plants and you start to realize how amazing of a plant cannabis really is.
Start Seedlings Indoors
If you do not want to keep mother plants or cuttings indoors, I still recommend starting your seedlings indoors and letting them grow and establish themselves before you replant them outdoors.
Plant Twice as many Plants Outdoors
If you cannot or do not have the time or space to do sexing indoors, simply plant twice as many seeds as you want plants, so that you can kill and eliminate any males as they reveal themselves. Keep in mind that the more pre-grow you give the plants before you put them outside, the bigger they will grow and the more you will harvest.
When you are flowering outdoors, it is the summer solstice and the days starting to grow shorter that indicate to the plant that it is time to start flowering.
The Moon Matters
Depending on when the new moon cycle is around the summer solstice, you will either go fast into flowering if it is a new moon and a dark night sky, or if it is a full moon and a bright sky, you will get another couple weeks of vegetative growth before flowering slowly kicks in around the new moon in July.
IPM Outside for a Successful Harvest
When growing outdoors, I still recommend spraying Trifecta and keeping an IPM schedule for outdoor plants. Remember to spray after the sun goes down because a lot of plants can be photosensitive.
I also highly recommend spraying with BT (Bacillus Thuringiensis) in the early stages of outdoor growth in order to inhibit caterpillars from ruining your plants. For those of you starting to grow outdoors, caterpillars are a nightmare and if you see them on your plants, it is already too late because what is happening is that they are peeing and pooping all over the stem as they crawl around and their urination and defecation attracts mold.
There's a lot more I could say on the subject of cannabis cultivation, but I am doing my best to make this article as informative, short and easy to understand.
I hope this article helps you better understand the process from seed to soil through harvest.